
For Bangla font writers and language enthusiasts, having the correct font installed on your device is crucial. Whether you’re drafting a novel, creating content, or simply communicating in Bangla, your experience will be greatly enhanced with a properly installed Bangla font. This guide will walk you through the process of installing Bangla fonts on both Windows and Mac systems so that you can start writing in Bangla without any hassle.
You can improve your reading, writing, and speaking in Bangla by adding Bangla fonts to your Windows or Mac machine. This guide will show you how to get Bangla fonts and put them on your computer, whether you have Windows or Mac.
Installing Bangla Fonts on a Windows PC
Download a Trusted Bangla Font:
Visit a trusted website such as OmicronLab or BanglaFont to download the desired Bangla font file.
Download the `.ttf` or `.otf` file to your computer.
Install the Bangla Font :
Locate the downloaded font file in your computer’s download folder.
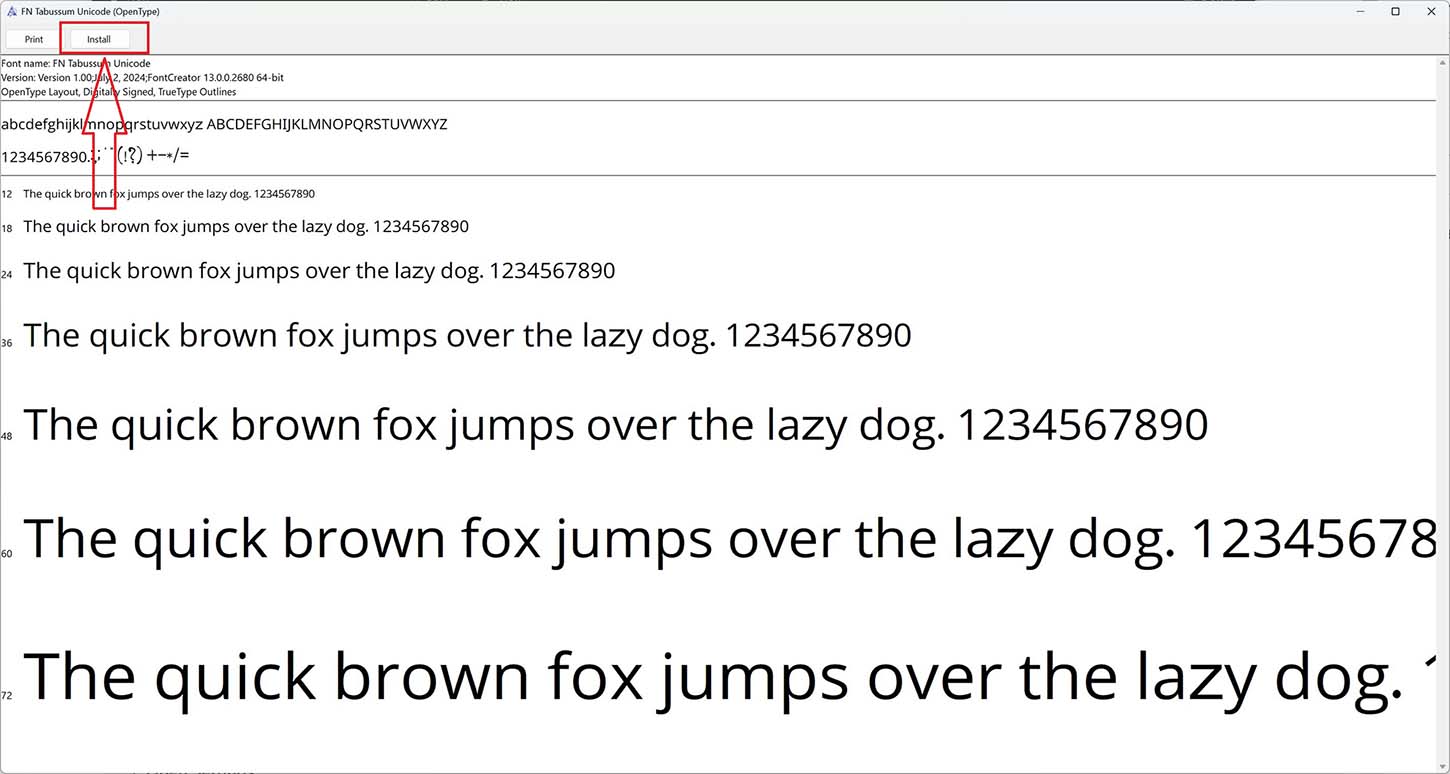
Right-click the file and select “Install”. The font will be automatically added to your system fonts.
Verify Installation:
Open any text editor like Microsoft Word
Scroll through the font list to find your newly installed Bangla font.
Select it and type a few characters to ensure it displays correctly.
How to Add the Bangla Keyboard to Language Settings in Windows
- Open Settings:
- Go to Settings > Time & Language > Language.
- Add a Language:
- Click on “Add a language”.
- Search for Bangla and add it.
- Set Up the Keyboard:
- Click on Options next to the Bangla language.
- Under Keyboards, click “Add a keyboard” and select the Bangla keyboard option.
- You can now switch between keyboards using the language bar on your taskbar.
Installing Bangla Fonts on a Mac
Step-by-Step Guide to Install Bangla Font on Mac
- Download a Trusted Bangla Font:
- Navigate to a reputable source like OmicronLab or BanglaFont and download the `.ttf` or `.otf` font file to your computer.
- Install the Font:
- Open Finder and locate the downloaded font file.
- Double-click the file to open the Font Book.
- Click “Install Font” at the bottom of the preview window. The font will be installed and available for use.
- Verify Installation:
- Open any text editor like Pages or MS Word.
- Check the font list to ensure your new Bangla font is available.
- Select it and type a few characters to confirm proper installation.
Tips on Sourcing Trusted Bangla Fonts
- OmicronLab provides a range of quality Bangla fonts, including popular ones like SutonnyMJ and Nikosh.
- BanglaFont offers a variety of free Bangla fonts, perfect for different writing styles and purposes.
- Ensure any site you download from is reputable to avoid malware or corrupted files.
Conclusion
Installing Bangla fonts on your Windows or Mac system is a straightforward process that can greatly enhance your writing experience. By following the steps outlined in this guide, you’ll be able to enjoy a seamless and enriched Bangla writing experience. Don’t hesitate to explore various Bangla fonts and keyboards available online to further personalise your setup. Happy writing!
Feel free to share your experiences or any additional tips in the comments below. If you have any questions or need further assistance, our community of Bangla writers is here to help!